Banoffee Pie in Pastry Crust with Chocolate Ganache
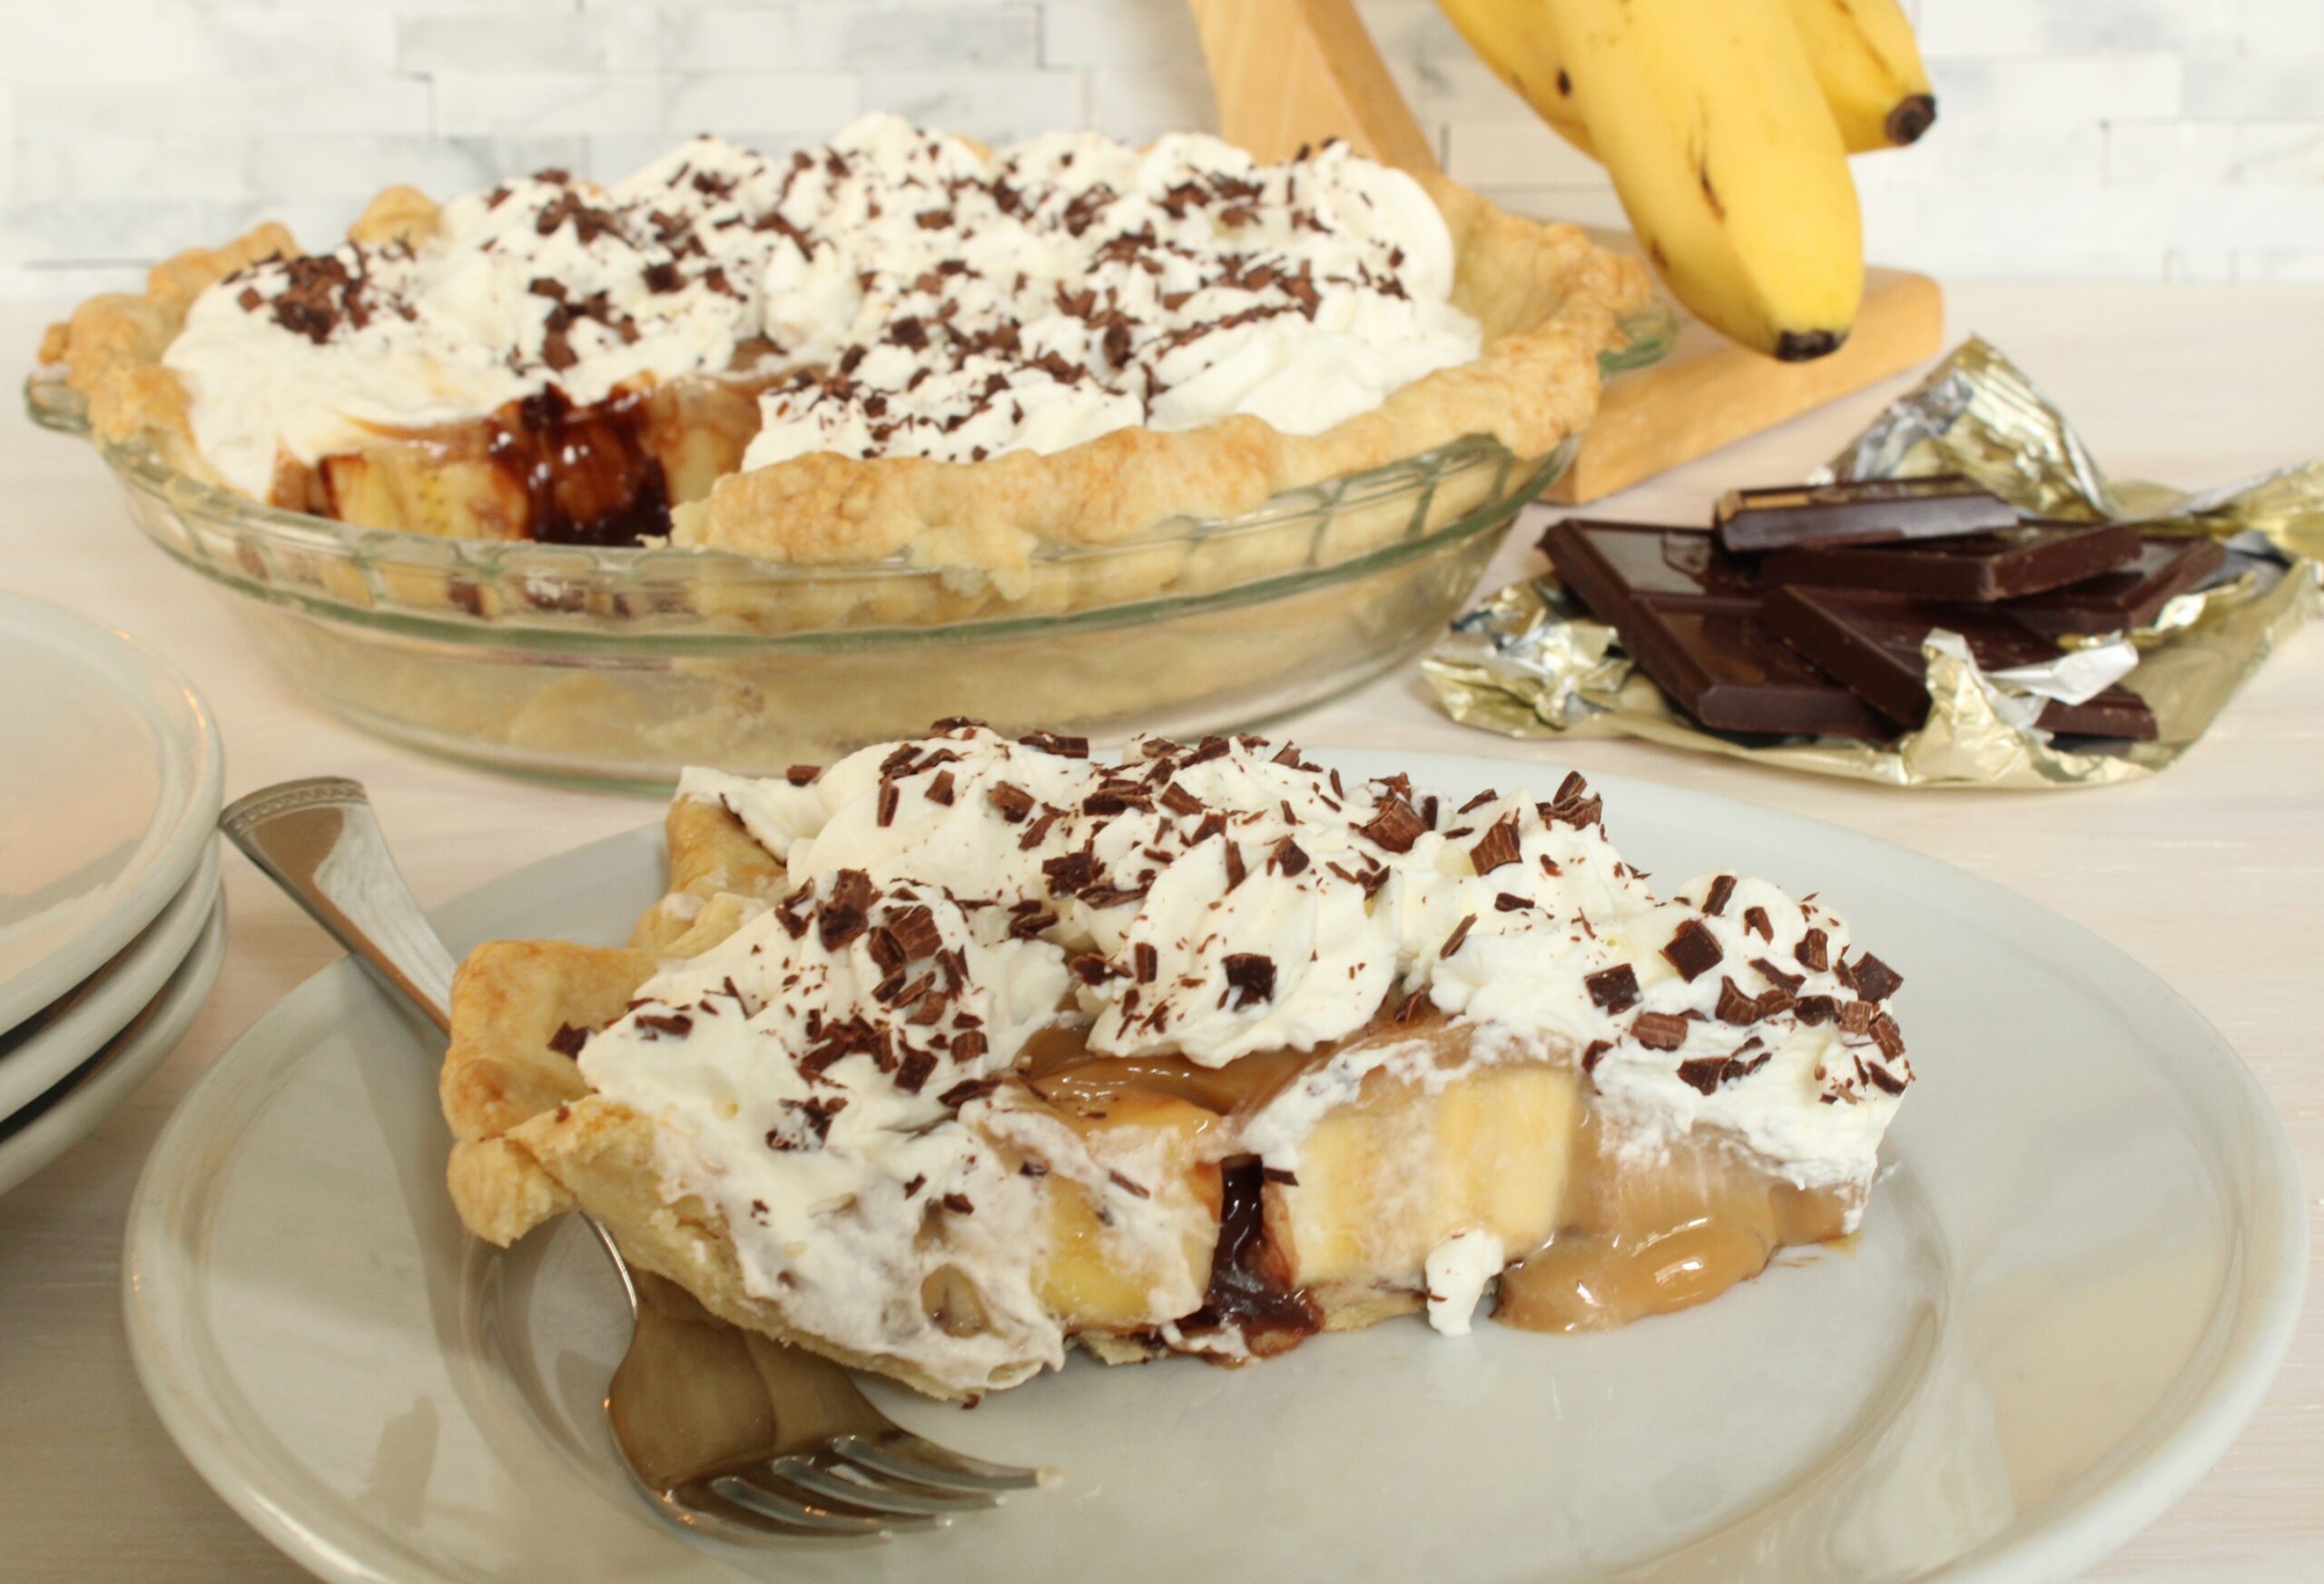
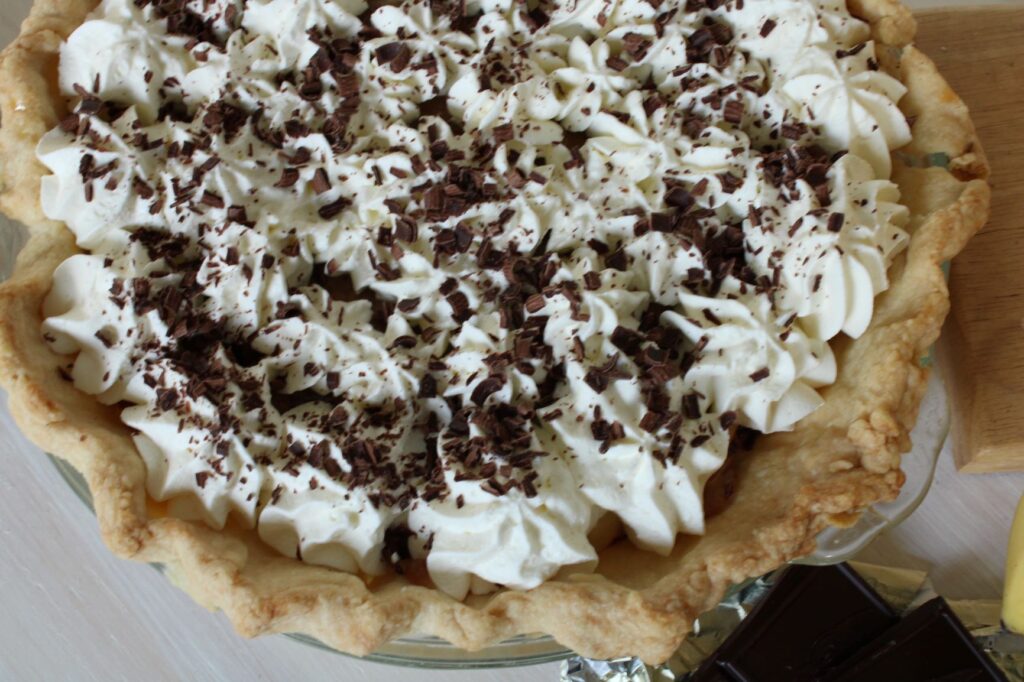
Banoffee pie in pastry crust with chocolate ganache is a crisp buttery pie crust filled with a delicious combination of ripe banana slices perched on a silky dark chocolate ganache covered in dulce de leche then mounded with lightly sweetened homemade whipped cream and, because I’m in an in-for-a-penny-in-for-a-pound mood, finished with grated bittersweet chocolate. Perfection in refrigerator pie form.
Our introduction to banoffee pie came on a snowy, freezing visit to Galway, Ireland. It was Easter Sunday and we’d driven down from Donegal where we’d gone to Easter Mass and visited the home of my O’Donnell ancestors. We arrived in Galway at dinnertime where we’d already made plans to visit the Pie Maker, a tiny shop with limited seating and an excellent reputation for traditional (and not so) Irish pies. We sat down in the warm, whimsical pie shop where each of us ordered a different savory pie for dinner, not a dud in the bunch. Three of the four of us ordered banoffee pie for dessert because it sounded just too kooky to pass up. For the record, my chocolate pie was TDF… but it’s the banoffee that silenced the bunch with its wonderfulness and what we’re discussing here so onward!
The Pie Maker version did not have ganache. It was just a beautiful crust filled with bananas and dulce de leche topped with whipped cream. That simplicity was eclipsed by the wow! factor of the flavor combination. Sometimes no fuss is the best way. But there’s always room for chocolate in my world.
I go through the steps of my banoffee pie recipe below. And you’ll figure out pretty soon it’s not actually “no fuss”. There’s the milk that needs cooking, the pie dough that needs making and baking, the cream that needs whipping, and the chocolate that needs shaving. But, and I would not suggest this, you could probably get away with quality store-bought on all the above. I haven’t tried it since the baking journey is the joy for me, but if you do, please let me know how it turns out.
The only definite here, and on this there is no argument, is that the bananas MUST be ripe. Perfectly ripe. They are the star of the show and if there’s any smidge of that under-ripe taste/feel … you know the one?… the pie just will not be right. So get your bananas in advance or find the ones at the store that nobody wants to buy (except me) and sally forth.
On to the joy of the process!
Please see the full recipe below and if you’ve got Q’s, I’ve got (hopefully) A’s listed here. If not, comment below and I’ll see if I can help or clarify.
DULCE DE LECHE
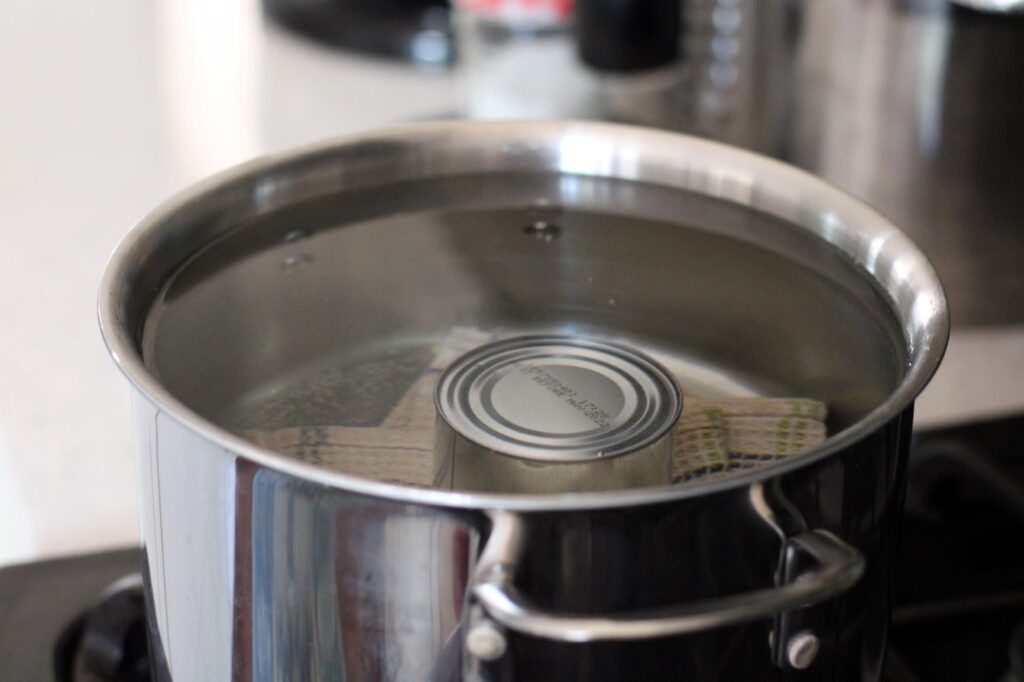
This is a time-taker. It takes three hours, mostly unattended, on the stove. There’s no getting around it. However! and this is a big however! you can make this a day or even a week ahead when you’ll be in the kitchen or even just around the house anyway.
Tips:
- Always use a pan large enough to hold the 14 oz. can plus dishcloth with enough water to cover by at least one inch.
- NEVER leave the pan simmering away without checking on it every half-hour or so. I keep the electric kettle full of water and heat it up when the water starts to get within the inch and then top off.
- THE CAN MAY EXPLODE if the water goes below the top of it. I have never had this happen but the google machine can take you to that place of wonder and horror.
- Get the water up to the simmer over high heat and then reduce until it’s just at a simmer. Keep there for three hours. This is the kitchen equivalent of a trust fall. It will work out! I say that smugly. The first three times I tried this technique, I took the cans off after two hours. It was still delicious! But not the dark toasted flavor that you get with three.
- The dish cloth in the bottom of the pan is to keep you from going insane listening to the incessant rattling of the can against the bottom of the pan which WILL happen without the cloth. I’d like to think it insulates the can at the bottom as well but that’s just a theory.

PIE CRUST
The pie crust listed below is my go-to recipe that I have used since I started making pies outside of my mother’s kitchen. It’s a butter-Crisco combo that is almost fail-proof. I say almost only because I’m sure there’s some way to mess it up but it would take some doing.
Tips:
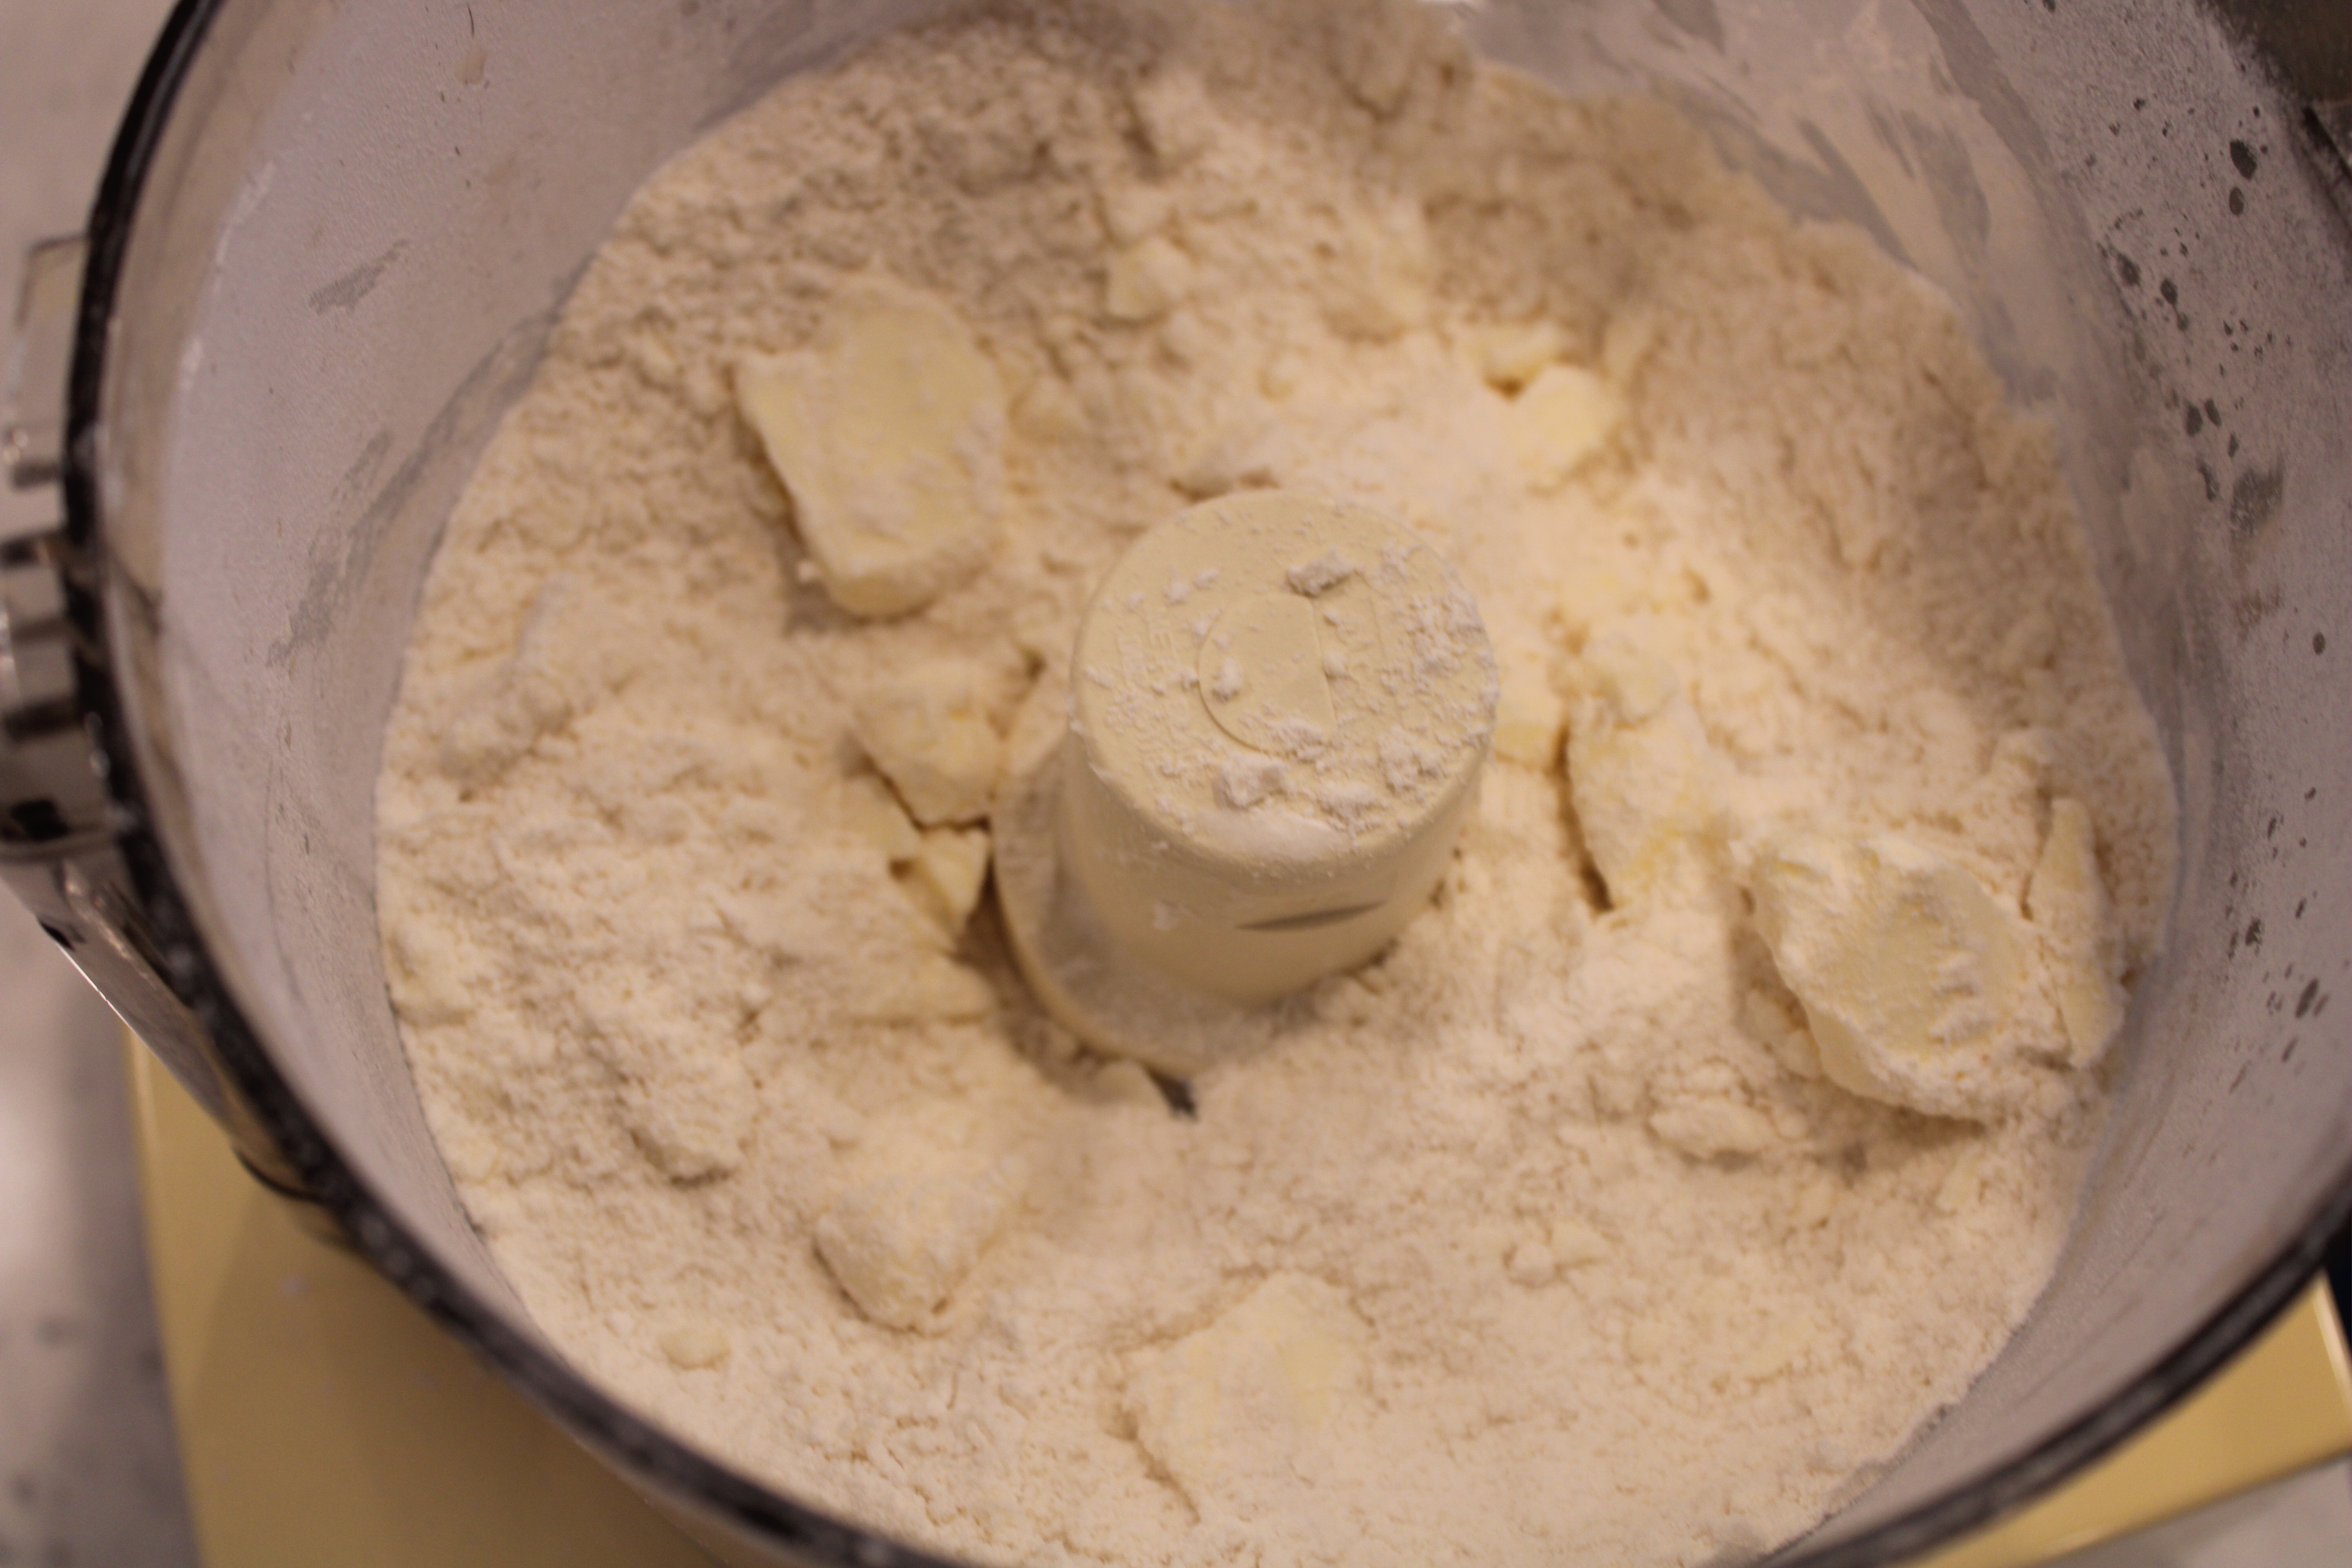
- You can most definitely make this recipe by hand with a large fork or pastry cutter. I go for the food processor because I’ve got hot hands and this makes it hands-off until I’m patting it into a circle.
- You can make the dough a day or two ahead of time. Double-wrap with plastic wrap to keep fridge odors out.
- Only add enough water to just make the dough smooshable (see right pic above where the ingredients look sandy but actually pinch together nicely). That is what makes the dough flaky.
- Use good butter. You’ll taste it.
- Use good flour. You’ll feel it.
- Use cold leaf lard (to sub for all or any portion of the fat) to make the crust if you have it. Excellent flavor/texture! I just didn’t have any.
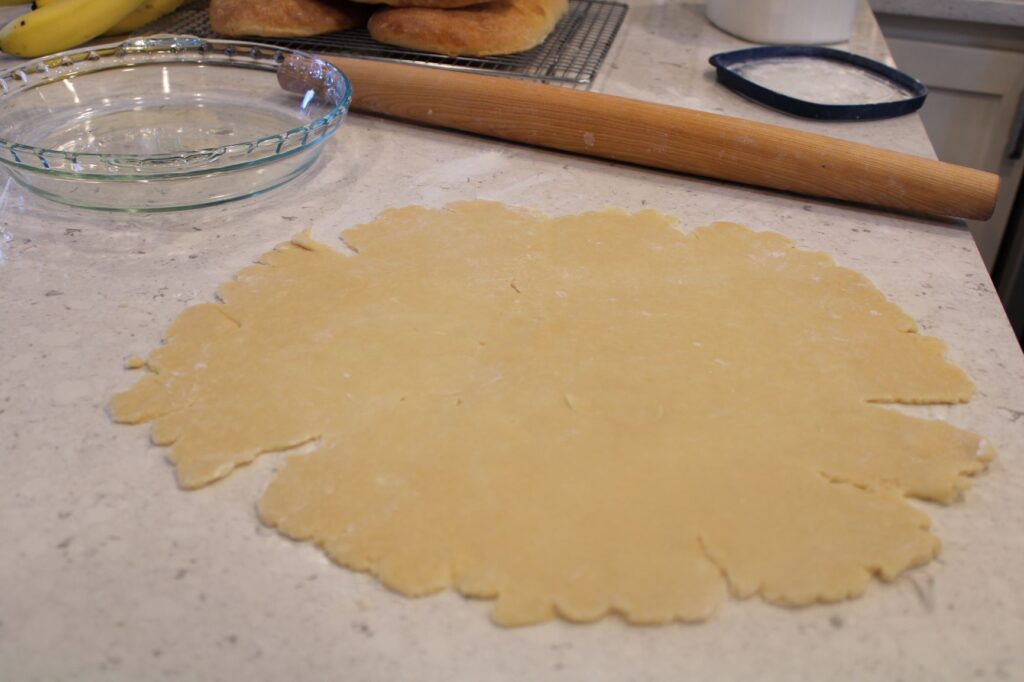
- When rolling out, if it splits around the edges (or even the center), you can patch it up. Don’t wad it up and re-roll it or you may get a doughy oily crust.
- Ditto if it doesn’t go nicely into the pie plate. Just patch as you go and carry on.
- Spray the pie plate (ever. so. lightly.) with non-stick spray. I once had a pie stick – inexplicably – to the plate with disastrous outcome. No more!
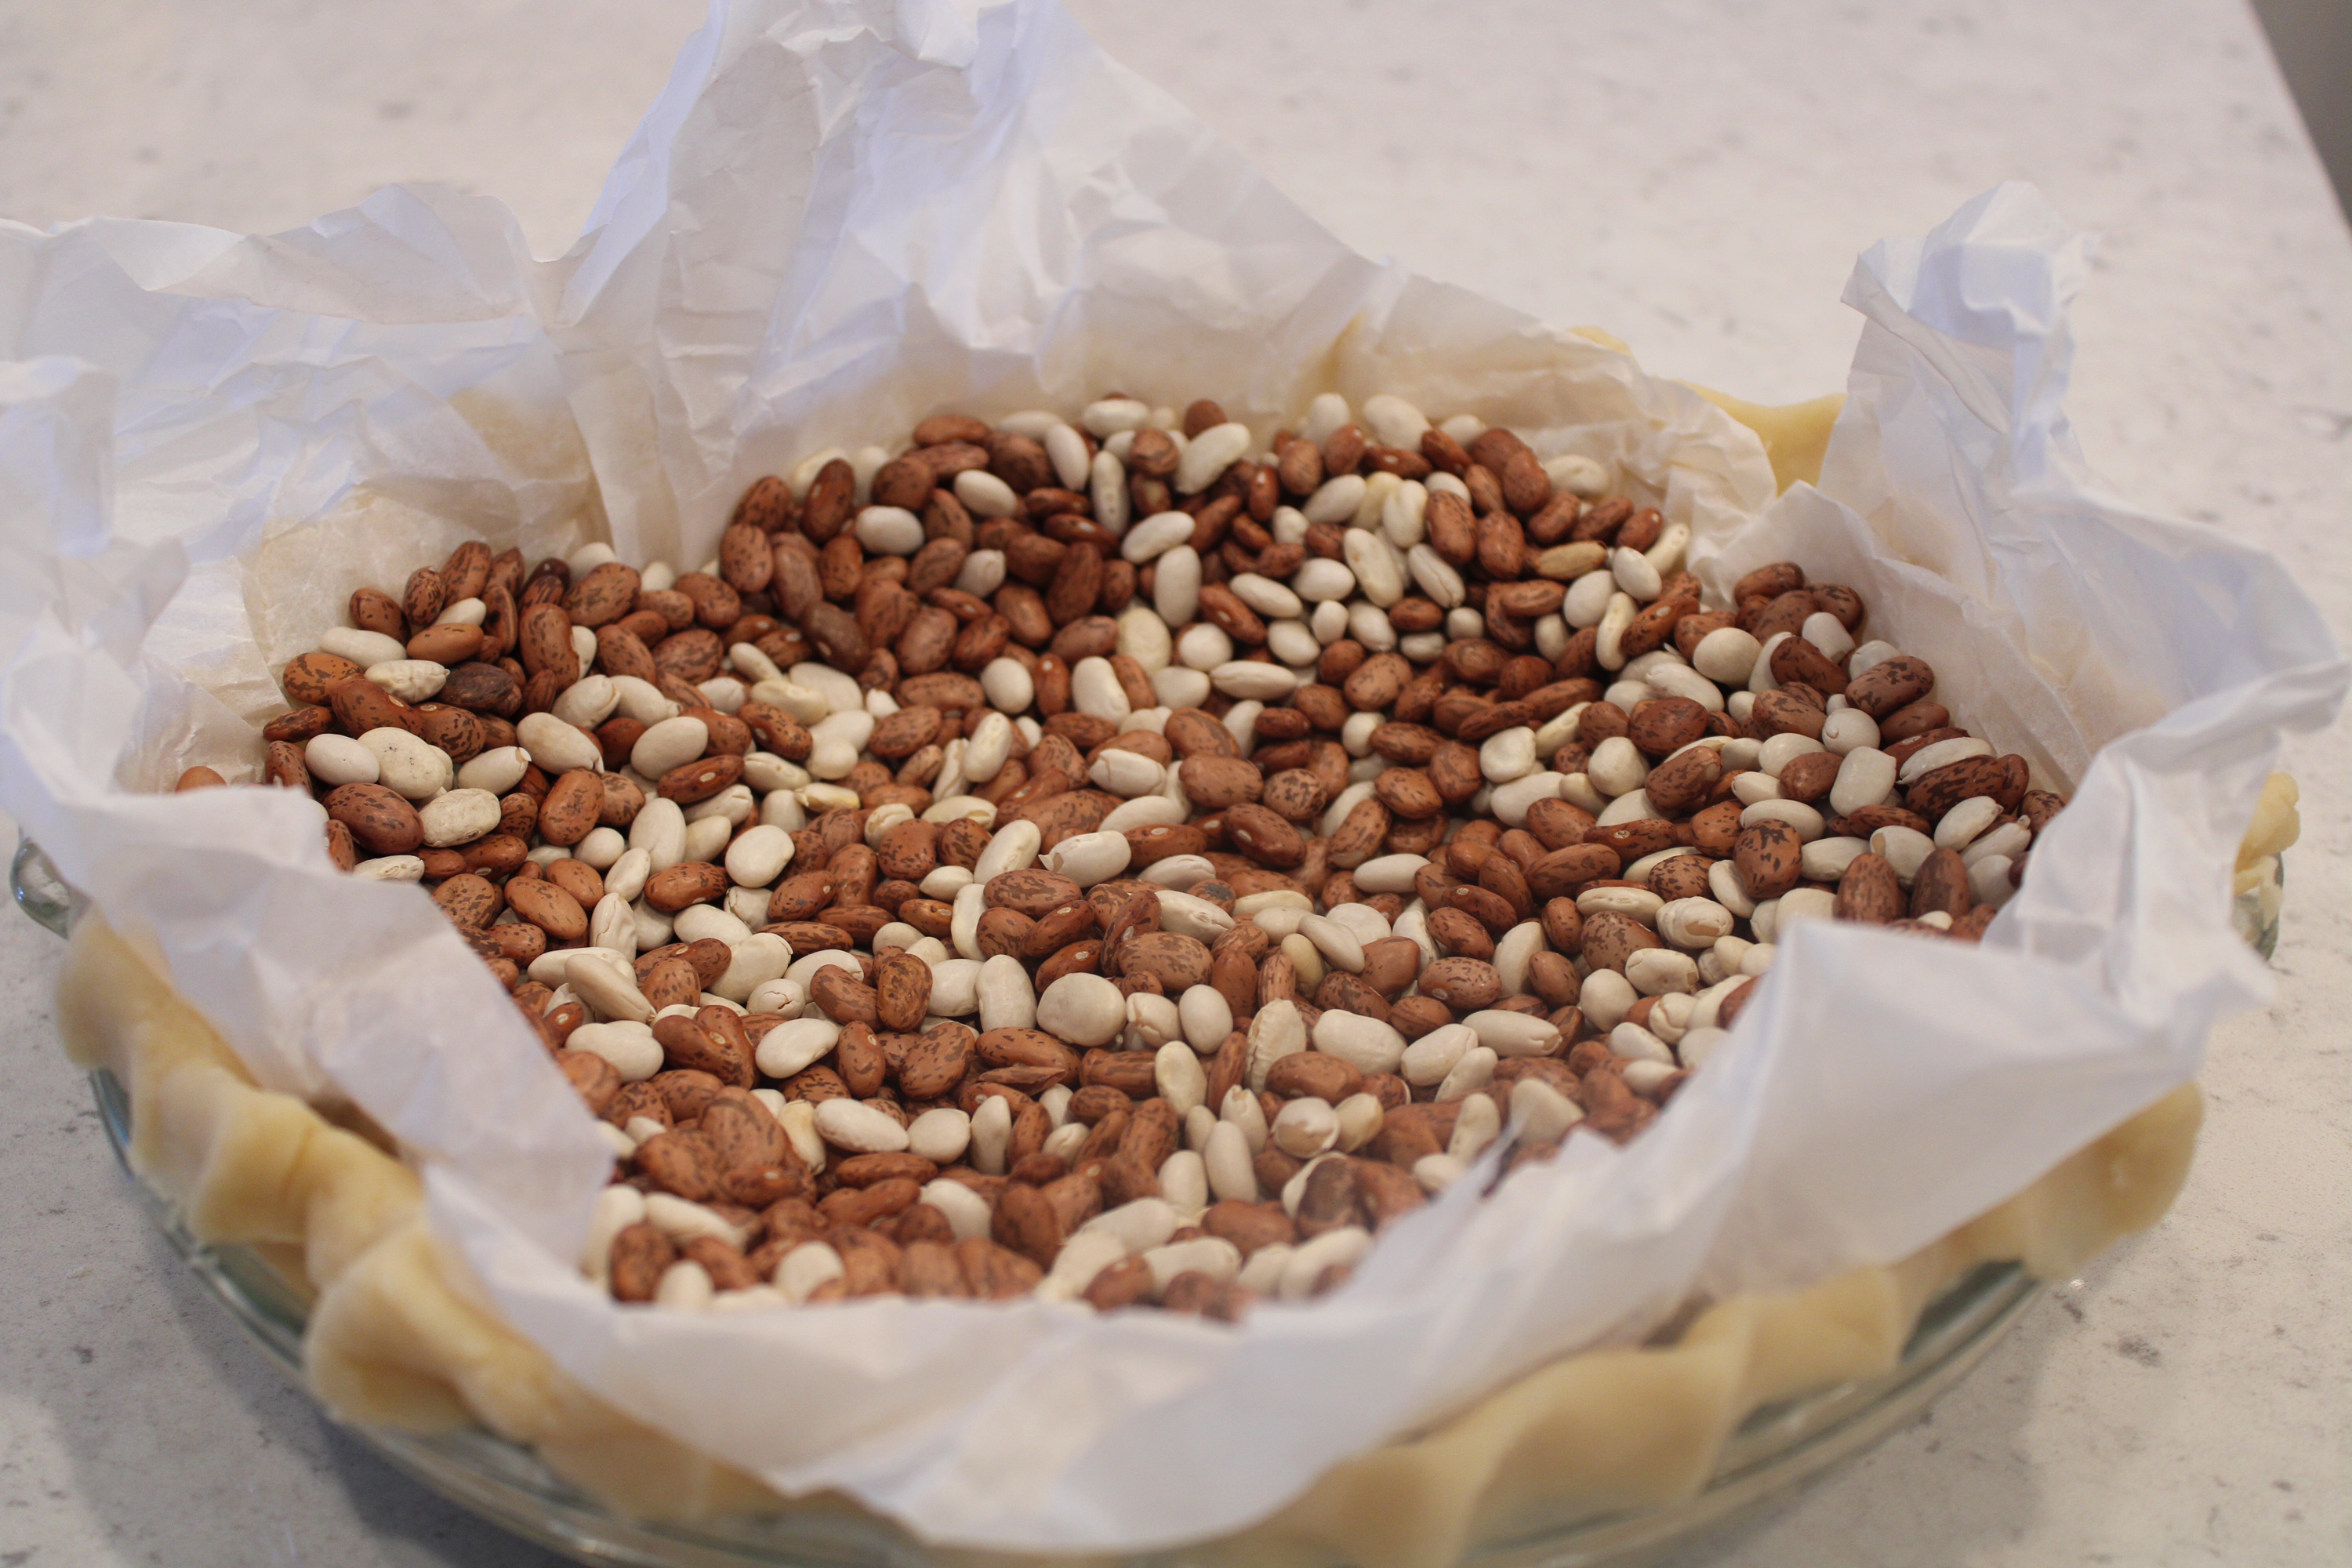
- Blind baking the crust until it’s crisp is a must. If you have pie weights, by all means, use those. I keep a bag of beans labeled “PIE!” in the pantry that work just as well. Once used as pie weights, you can’t use them for eating. This is okay because I’ve had this same bag of pie beans for years.
- I use parchment though you can use aluminum foil that’s been sprayed with non-stick spray on the dough side to hold the beans/weights. Before using, I crumble the parchment vigorously so that it’s more malleable, fitting up the sides, when putting into the dough. After baking, I wipe it off and keep it folded in with the “PIE!” beans.
- Halfway through the blind baking you will need to take the weights/beans out. I bring the pie onto the stovetop, grab all four corners at once and roll them out from one side to the other with a kind of peeling action. I’ve never (knock wood!) had a problem with the dough coming along for the ride.

BANOFFEE PIE FILLING
Once the crust has cooled completely, the pie comes together pretty (relatively?) quickly.
Tips:
- Weigh out the chocolate and heavy cream if, like me, when it comes to chocolate your eyeballs skew heavy. You do want a generous layer but there are some who may balk at a pool …and it does take away from the balance.
- Feel free to use the double-boiler method to melt the chocolate and cream.
- Feel free to scald the milk and pour over the chocolate (this would be more traditional).
- If patience is not your forte (funny, since you’re this far into a pie that requires it…ha!), the microwave needs to be checked at 20-30 second intervals with a good stir at each stop. You CAN burn the chocolate/cream mixture which will seize up in an unattractive (yet still edible so all’s not lost) way.
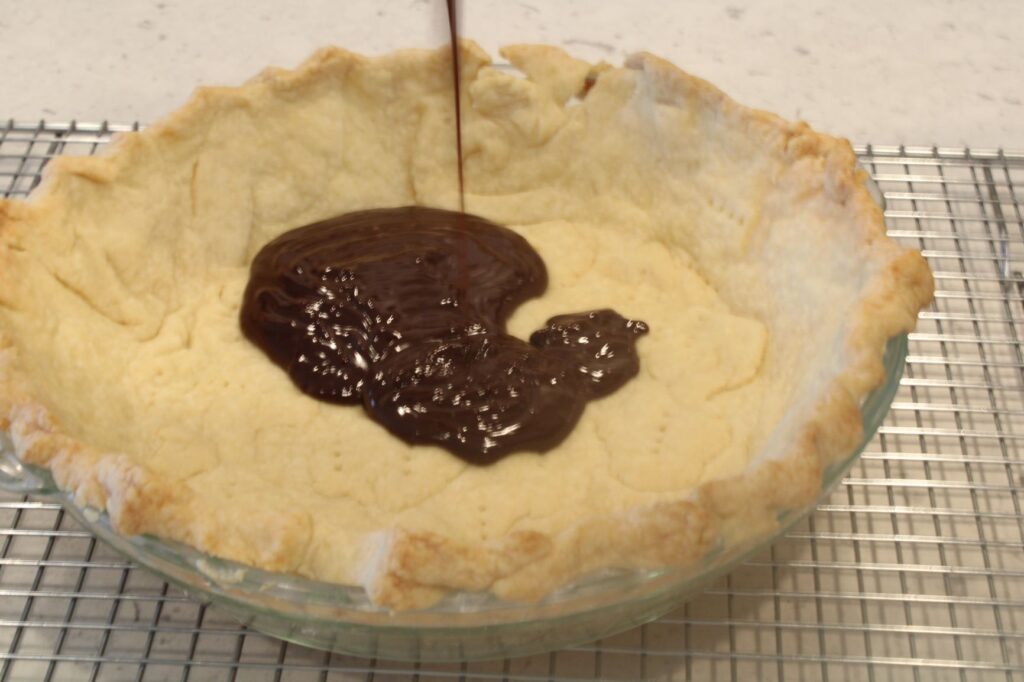
- Once the chocolate is cool, pour it into the baked pie crust and smooth over the entire bottom.

- Slice the bananas into 1 inch pieces (too thin and they get lost in the mix) and cover the entire bottom of the pie snugly though don’t press into the ganache.
- Each time I have made this pie, I’ve used three large bananas. There’s really no way to offer a cup (or even weight) measurement because it depends on the slicing. Just know that it looks like three large won’t fit but they always do for me.
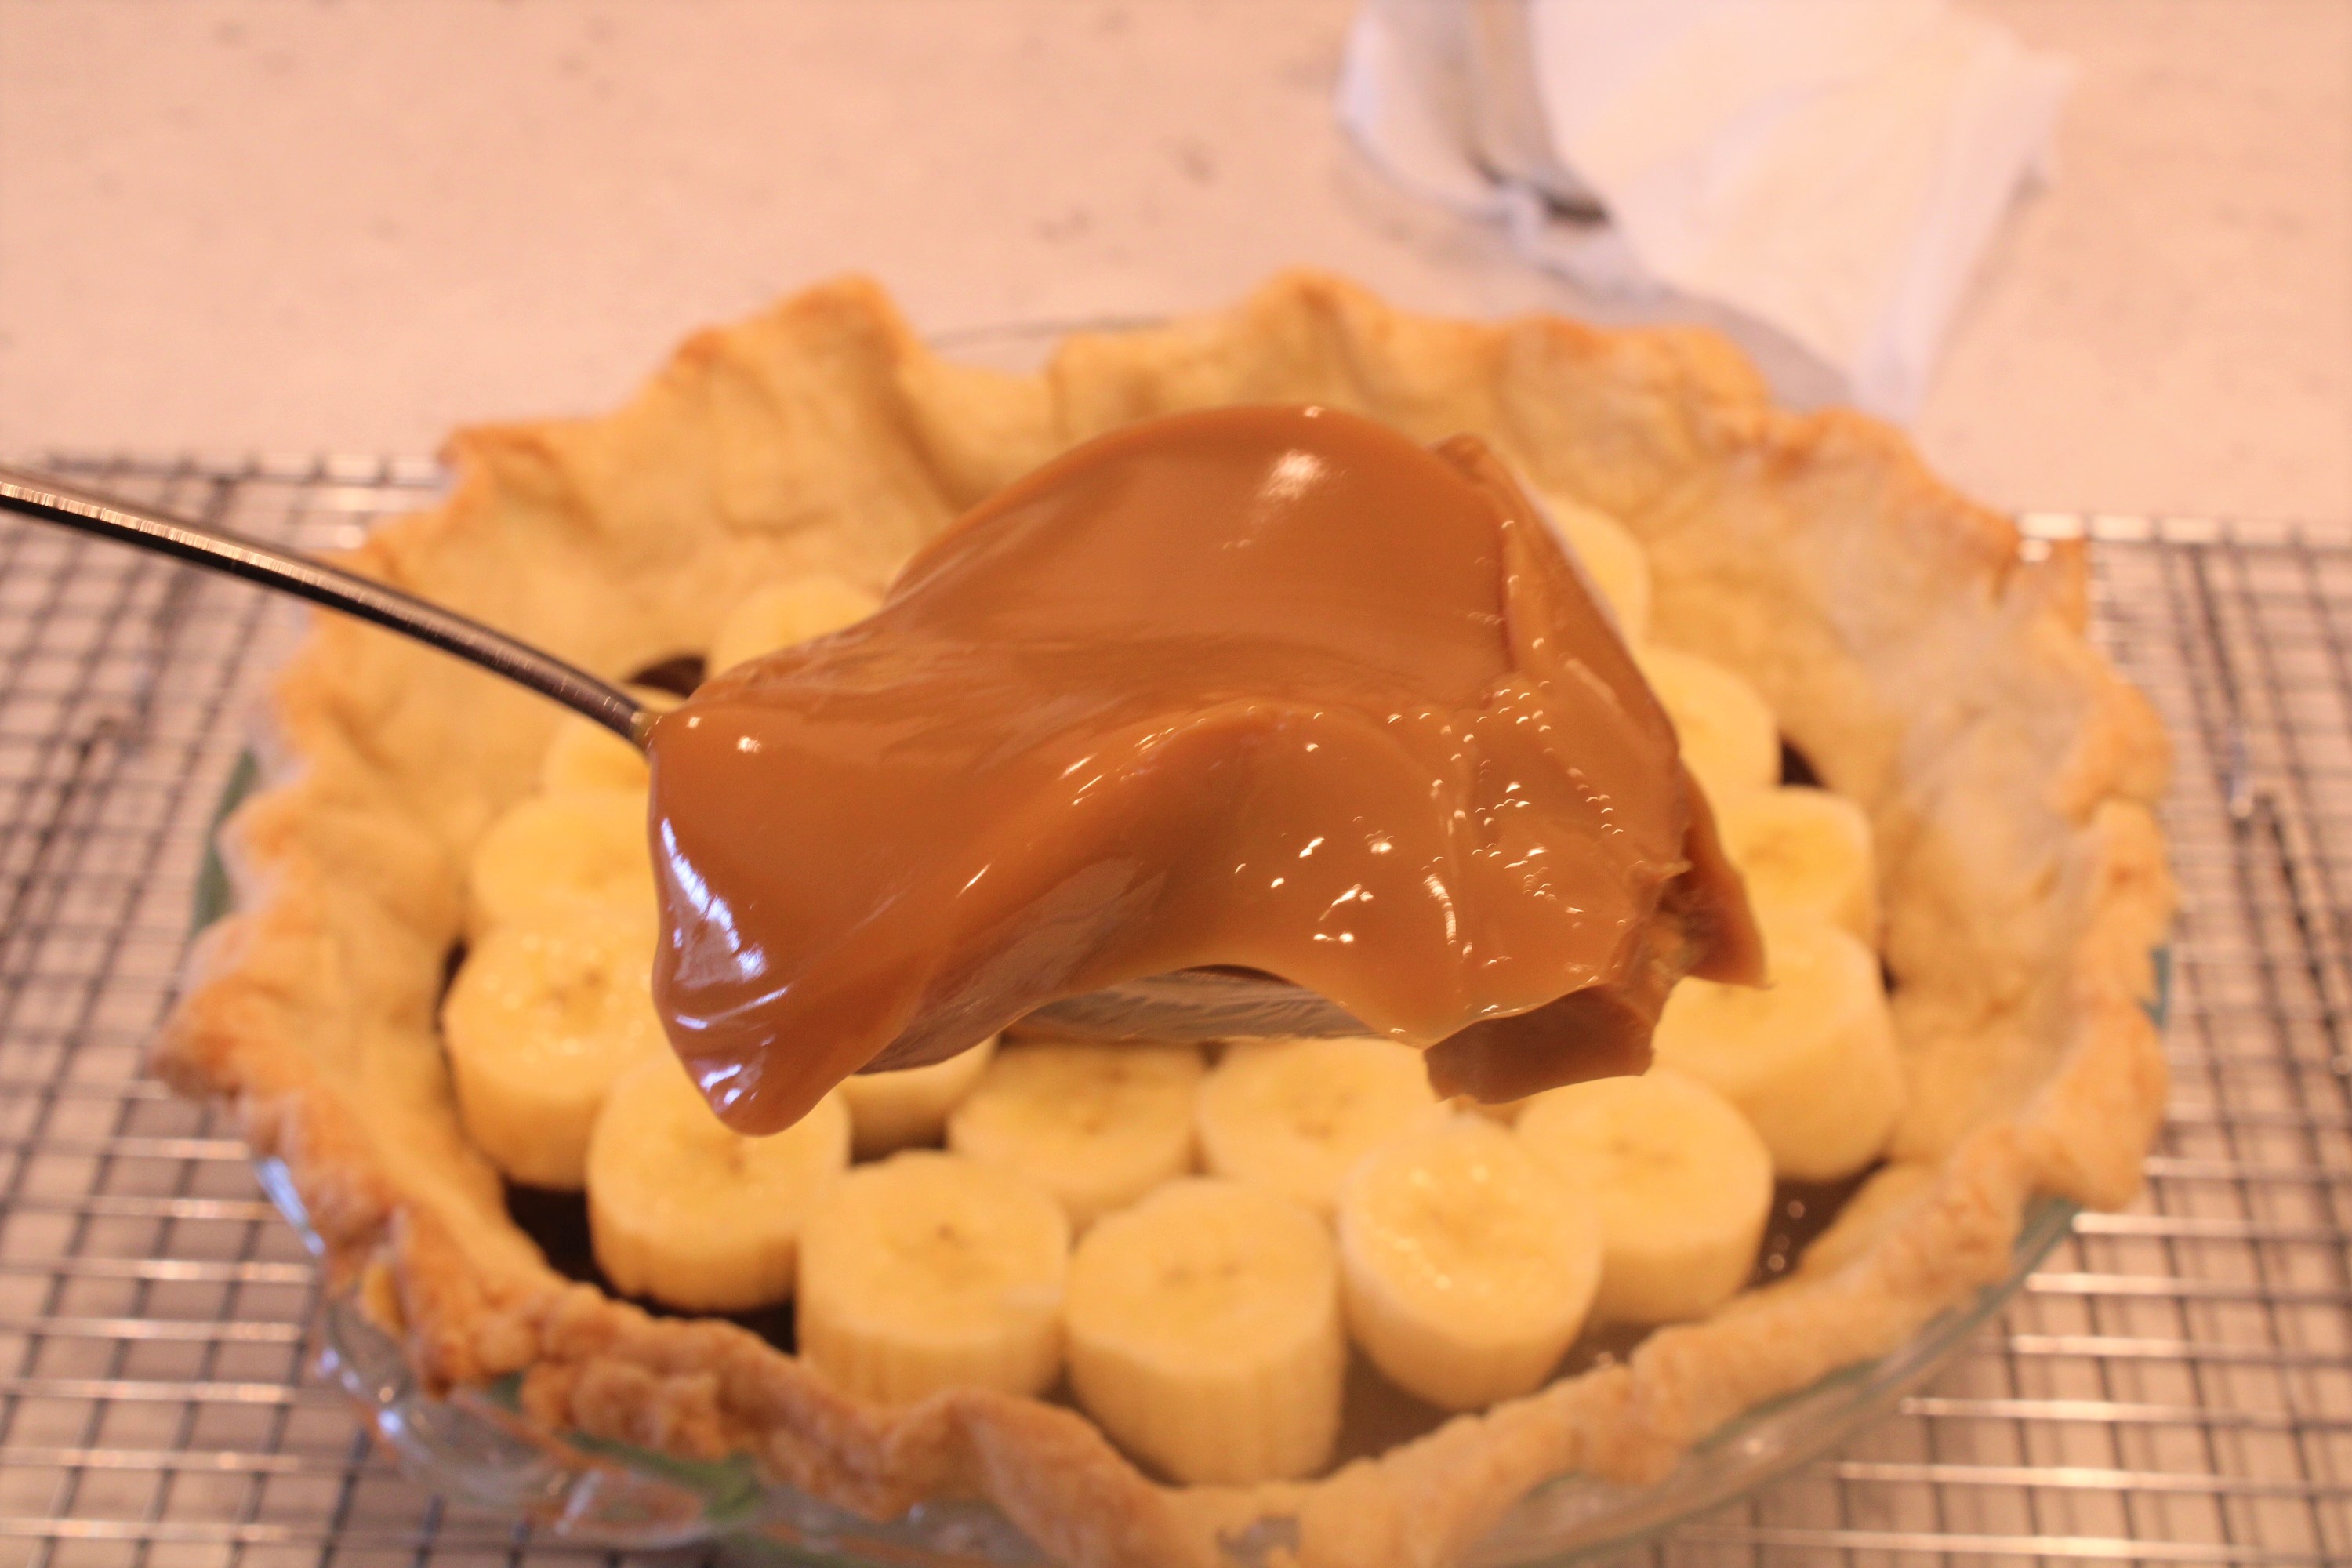
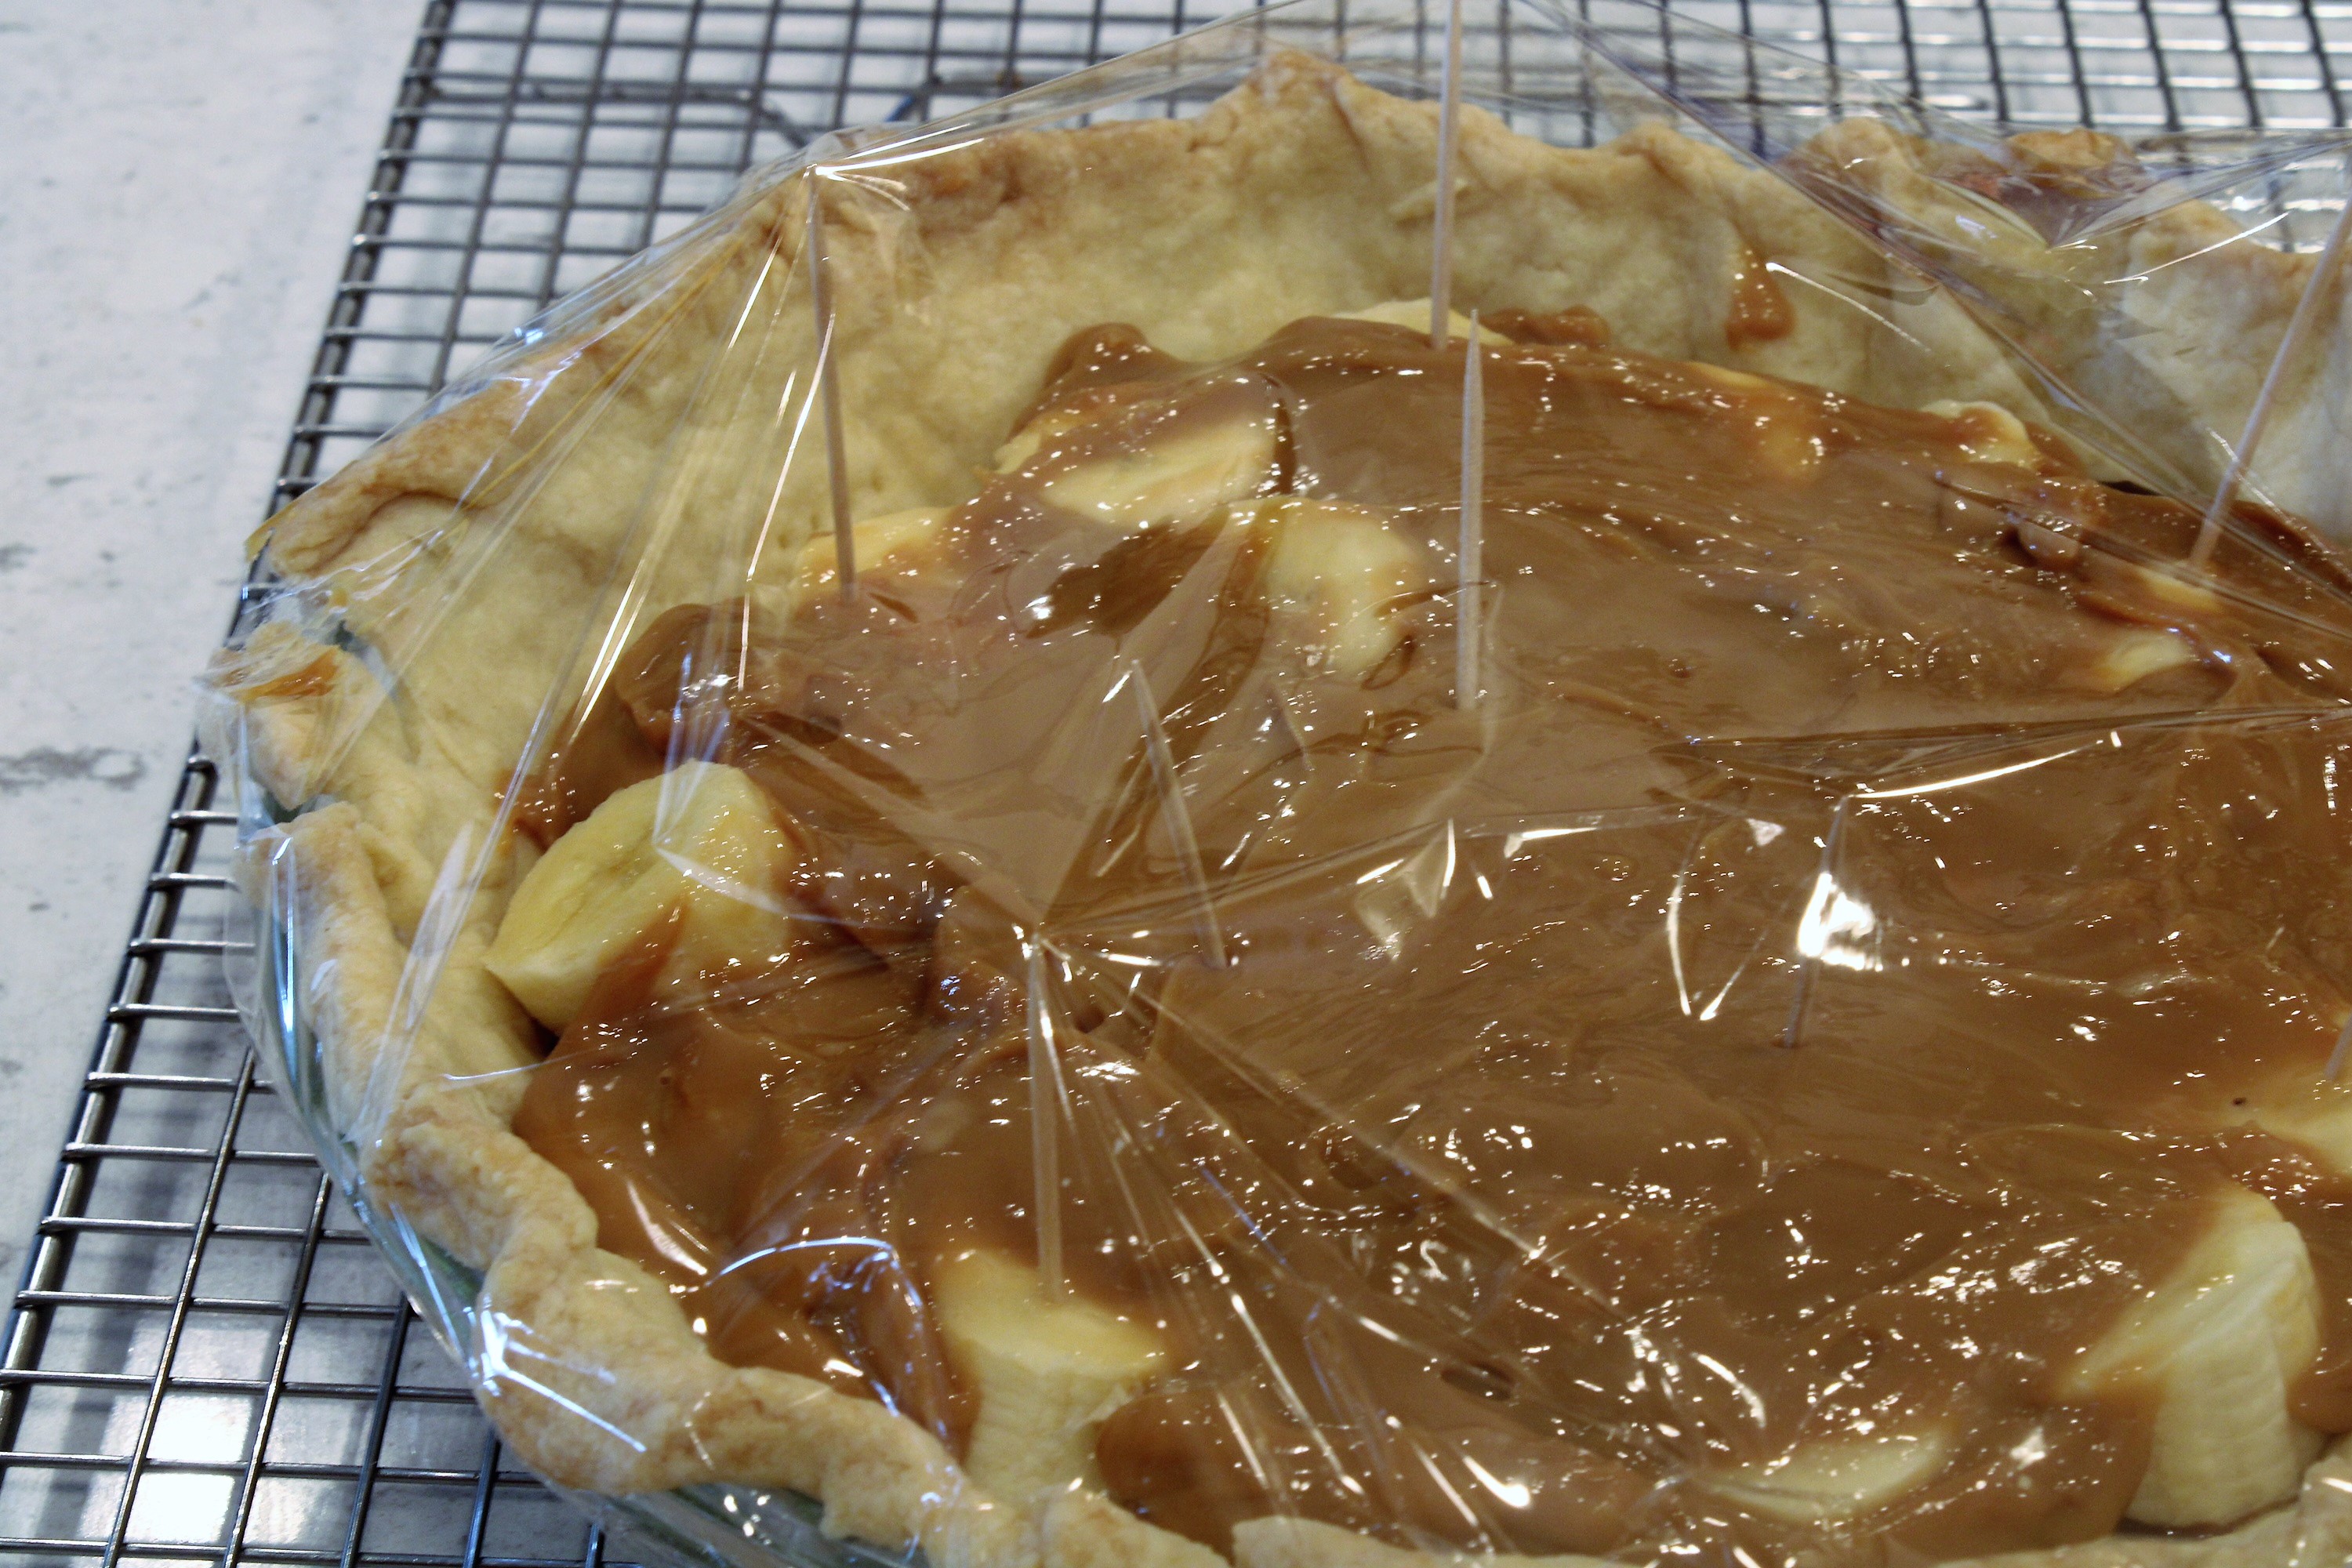
- Spread the dulce de leche over the bananas. Please see the pic at the top of this page to see how the sweetened condensed milk has turned into a spoonful of toasty caramel delight.
- If you’ve made the dulce de leche the day (or so) before, you can put the unopened can into a small saucepan (no dishcloth required), bring to the boil and then remove from the heat and let it sit for about five minutes. This will make it a more spreadable consistency if you’re worried your technique (a la natural peanut butter) will dislodge bananas and make a mess of things.
- When you’re set to refrigerate the filled pie, it helps to use toothpicks like tent poles to keep the plastic off of the dulce de leche which WILL stick to the plastic. I find five around the sides and three in the middle work just fine. I tried a disposable shower cap once. But it was too tight, slid up the sides and crushed most of the edge of the pie crust. It was still edible but not too pretty to look at. I just piled the edge bits on like I’d meant it to look that “rustic”.
I hope you try this banoffee pie in pastry crust with chocolate gananche … as much a mouthful to say as a treat to eat. If you do, please let me know in the comments below or on social media … Instagram’s my baliwick but I do have a FB account. I’m at @piecrustandpasta #piecrustandpasta. Glad to answer questions, correct any mis-writes. Just let me know and thanks for reading.
Banoffee Pie in Pastry Crust with Chocolate Ganache
Ingredients
Crust
- 1 cup all purpose flour
- 1/3 cup cake flour
- 1/2 tsp kosher salt
- 1 tbsp sugar
- 6 tbsp unsalted butter, cold and cut into 6 pieces
- 2 tbsp vegetable shortening, cold
- 3 tbsp ice water
Filling
- 14 oz sweetened condensed milk OR PREPARED DULCE DE LECHE
- 4 oz bittersweet chocolate
- 12 oz heavy cream divided
- 3 large bananas, very ripe
- 2 tbsp powdered sugar
- 1-2 tbsp bittersweet chocolate, shaved OPTIONAL
Instructions
DULCE DE LECHE FILLING – SKIP IF USING PREPARED DULCE DE LECHE
- In a 4 qt saucepan, place a cloth (I use a dish washcloth) on the bottom and sit the can of sweetened condensed milk on top – WITHOUT THE LABEL. Cover by at least one inch with water and place over medium-high heat until the water reaches a simmer. Regulate the heat to keep it just at the simmer and watch the water level to keep the can covered.
- Simmer for three hours, adding additional boiling water (I use an electric kettle for this) to keep covered. IT MUST BE COVERED BY WATER AT ALL TIMES TO PREVENT THE CAN FROM EXPLODING.
- Cool in the can, unopened, one hour. If you've made this in advance, sit in a small pot of water brought JUST to the boil and turned off (no need to cover since you're just heating it up a bit).
CRUST
- In a food processor with the metal blade mix the flours, salt and sugar with a few pulses.
- Add the cold butter and shortening and pulse about six to eight times until the butter and shortening are cut into the flour in hunks.
- With the processor running, add the ice water slowly through the feed tube until the dough holds together but is not wet. If the dough won't hold together when pressed together, add up to one more tablespoon of ice water but no more.
- Dump the dough onto a counter, making sure all of the flour has been incorporated and there are no wet spots. Form it into a ball. Press into a flat round and wrap in plastic wrap. Refrigerate at least one hour before rolling out.
- Using a rolling pin, roll the dough out into a circle that is large enough to fill a 9" pie plate all the way up the sides (approximately 12 inch circle).
- Put the dough into the pie plate and crimp the edges so that they are sitting on the top edge of the plate. Using a dinner fork, poke holes all over the bottom, maybe 10 pokes, to prevent the dough from bubbling in the oven.
- Put the piecrust into the refrigerator and chill while you preheat the oven to 350F.
- When you are ready to bake, take the pie crust out of the refrigerator. Place a piece of parchment (or foil that has been sprayed with non-stick on the side touching the crust) that goes all the way up the sides into the pie dough and fill with pie weights (I use dried beans that are just for that purpose).
- Bake in the lower half of the preheated oven for 15 minutes. Remove the parchment and pie weights and put the crust back into the oven for another 15 minutes or until the crust is golden brown. Cool completely on a cooling rack.
PIE ASSEMBLY
- Prepare the ganache by microwaving 1/4 cup of the heavy cream with 4 oz (1/4 cup) of the bittersweet chocolate, stirring every 30 seconds or so until it is just melted together into a glossy sauce.
- Pour the ganache into the cooled pie crust and spread with the back of a spoon to cover the entire bottom.
- Peel and slice the bananas into 1 inch disks, snugly fitting them on top of the ganache to cover the entire bottom of the pie crust.
- Open the can of dulce de leche and pour over the bananas, gently spreading with the back of a spoon to cover. Cover the pie with plastic wrap (I use toothpicks for tenting to keep the plastic from sticking to the filling) at least one hour until ready to serve.
- Before serving, whip the remaining heavy cream to stiff peaks with the powdered sugar and either pipe on using a piping bag or dollop and spread with the back of a spoon or offset spatula.
- If using, sprinkle chocolate shavings over the whipped cream. Serve!
- Leftovers need to be covered and refrigerated.
1 thought on “Banoffee Pie in Pastry Crust with Chocolate Ganache”